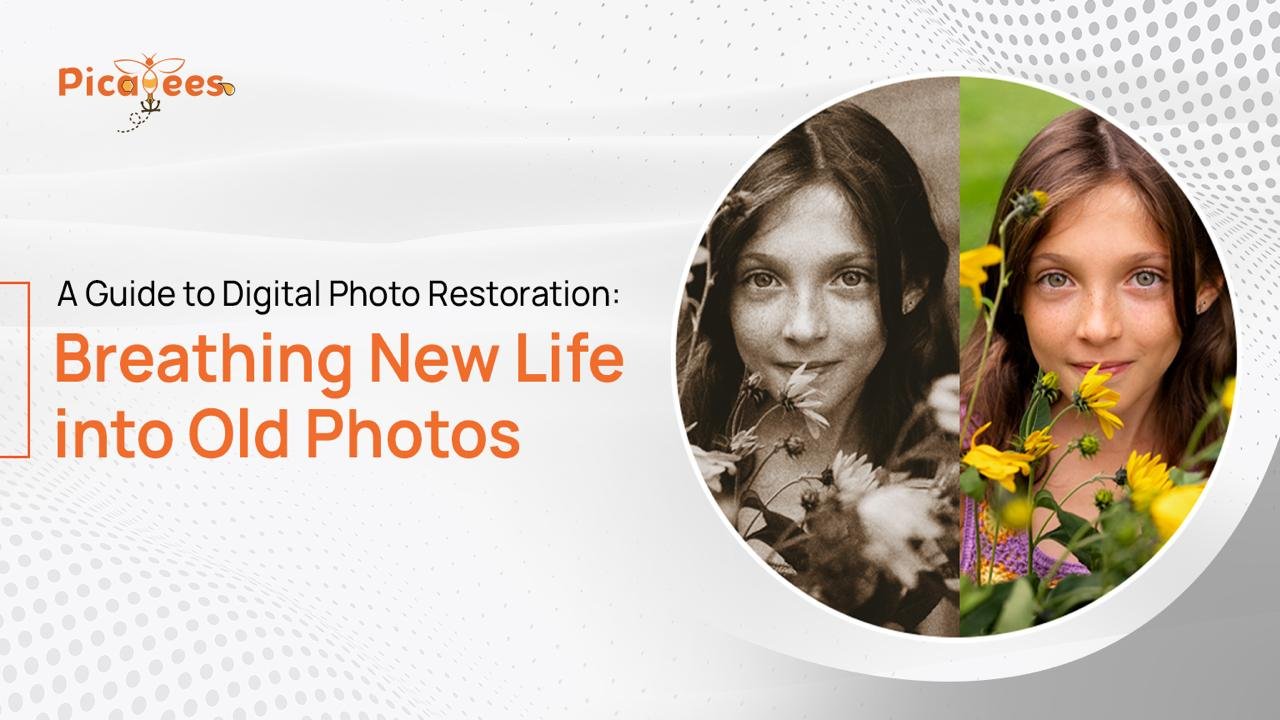
Digital Photo Restoration is essential because millions of photographs in physical form are digitized to preserve memories. Why? Unfortunately, most of these collections are damaged, whether in the form of rough handling, unsafe storage, or the simple fact that the physical materials degrade over time no matter how carefully they’re treated. When a digitization team creates a digital copy of those photographs, they’re capturing an image of the physical picture as it exists. This will include the fading, scratches, and other issues that may come with it. But with digital restoration, we can turn back time on these digital images, to make them look as close as how they looked when the original photo was taken. This technique of digitizing old photos and bringing them back to life is called photo restoration. The technique uses specific digital restoration tools to re-create or improve digital versions of old and worn-out photographs. Restoring Faded Photographs or Digital Photo Restoration Fading is one of the, if not the most common issues with older photographs, whether they’re color, sepia, or black and white. This is a result of the pigment breakdown in the photo, accelerated by a variety of environmental factors, one of the most common being UV light and the other one being acid! As you may know, most papers are made from wood. And wood contains varying amounts of lignin. As the lignin in paper breaks down, it produces acid. If photos are being stored in contact with wood, paper with lignin, or other acidic materials like adhesives, this will contribute to degradation and fading. For photos that have already experienced fading, we can digitize and restore them by darkening the shadows and deepening colors, while keeping an eye to ensure that the values stay true to the original image. Repairing Physical Damage on a Digital Photo Tears, folds, scratches, stains, and more! There’s a lot that can happen to a photograph over some time. How well a flaw can be fixed during the process of Digital Photo Restoration depends mostly on the size and location of the damage. Most commonly, these digital repairs are done by concealing the damaged area behind visual elements taken from other parts of the photo. This means that flaws on solid backgrounds or repeating patterns will be easiest to cover and blend in. Other methods, such as manually tightening a stain, may be used when the damage is in a more complex area. Large Portions of Photo Loss What should you do if a large portion of the photo is severely damaged or completely missing? Don’t worry, not all hope is lost! Thanks to generative AI technology, it is possible to “restore” the image even in such conditions. The program can look at the parts of an image that remain and generate options for what the missing part would have been most likely to look like and it’s surprisingly accurate on most occasions. Digitization and retouching can help in replacing smaller sections of loss or even large pieces of the background. But at the same time, don’t consider this as a useful technique when it comes to correcting crucial parts of the photo, such as people’s faces. Reversing the Yellow effect Yellowing of your photos is a result of direct sunlight falling upon them over some time, this tends to be especially common in color photographs taken with home cameras in the 1990s or before that. When color photographs first came into the picture, they were not as stable as the ones today are. Since different dyes break down at different rates, this leads to the most stable colors, usually yellow, staying longer and causing a color cast over the image. To reverse this process, the photo must be digitized, turned to black and white, and then colorized accordingly. Thus, eliminating the yellow effect and restoring the original color of the photo. How Picabees can give your old photos a new lease of Life Now that you’ve realized that you can, in fact, restore your old photos. You must be thinking, “Where can I get them restored at an affordable price?”. The answer to your burning question is Picabees! We’ve been specializing in providing photo restoration services all around the world for over 8 years now. With hundreds of five-star reviews from clients and thousands of images restored with 99% accuracy, not going with us would be a no-brainer. To top with what we mentioned, we will repair your cherished photos with great turn-around time and at a very reasonable price. Send us an email with your request to know more.
6 reasons to make the Best use of Smart Objects in Photoshop
Photoshop Layers are great and allow you to edit your photos without destroying the original. Smart Objects take this concept of nondestructive editing even further and enable you to make changes without losing quality. Smart Objects are a versatile and powerful feature in Adobe Photoshop that offers numerous advantages in various scenarios. ‘Smart Objects’ in Photoshop, what is it? With the rapid advancement of photo editing software, post-processing techniques and workflow options have become incredibly diverse, offering seemingly endless creative possibilities. However, understanding the impact of these edits on your image data is crucial to avoid unnecessary rework and preserve the quality of your work. When working with rasterized layers, any edits you make directly alter the image data, resulting in destructive editing. Photoshop removes data based on your edits, which can limit your options for future adjustments. For instance, cloning a part of your image involves overwriting the pixel-level data. In contrast, Smart Objects in Photoshop provide a non-destructive editing workflow by preserving the original RAW data of the image, allowing for flexible edits without compromising the image quality. Here are some compelling reasons why you need to start using Smart Objects: 1. Nondestructive Editing: Smart Objects allow for nondestructive editing, meaning that the original image or layer remains intact while changes are applied to the Smart Object. This enables experimenting with different effects, transformations, or adjustments without permanently altering the underlying content. 2. Flexibility and Scalability: Smart Objects are resolution-independent, which means they can be scaled up or down without losing detail or quality. They retain vector data, ensuring crisp and smooth edges even at large sizes. This makes Smart Objects ideal for logos, icons, or graphics that need to be adaptable to different dimensions. 3. Layer Effects and Transformations: Smart Objects provide a convenient way to apply layer effects and transformations without directly affecting the original image. Changes can be adjusted or removed non-destructively, maintaining the flexibility of the design process. 4. Linked Editing: Smart Objects can be linked to an external file, such as an image or a vector graphic. When the source file is updated, the changes are automatically reflected in all linked Smart Objects, saving time and ensuring consistency across multiple instances. 5. Filters and Adjustments: Applying filters or adjustments to Smart Objects allows for fine-tuning and experimenting with different effects. The original data remains intact, enabling non-destructive adjustments and easy comparison of different versions. 6. Masking and Compositing: Applying filters or adjustments to Smart Objects allows for fine-tuning and experimenting with different effects. The original data remains intact, enabling non-destructive adjustments and easy comparison of different versions. In conclusion, Smart Objects in Photoshop offers a powerful and flexible approach to photo editing. They provide numerous advantages, from nondestructive editing and scalability to easy masking and linked editing. By incorporating Smart Objects into your workflow, you can ensure that your images maintain their quality and integrity, no matter how many adjustments you make. If you want professional photo editing using Smart Objects or need help enhancing your images, visit Picabees. Let us take care of your editing needs so you can focus on capturing great moments!
Real Estate Photography with Smartphone: 7 Tips for Stunning Photos
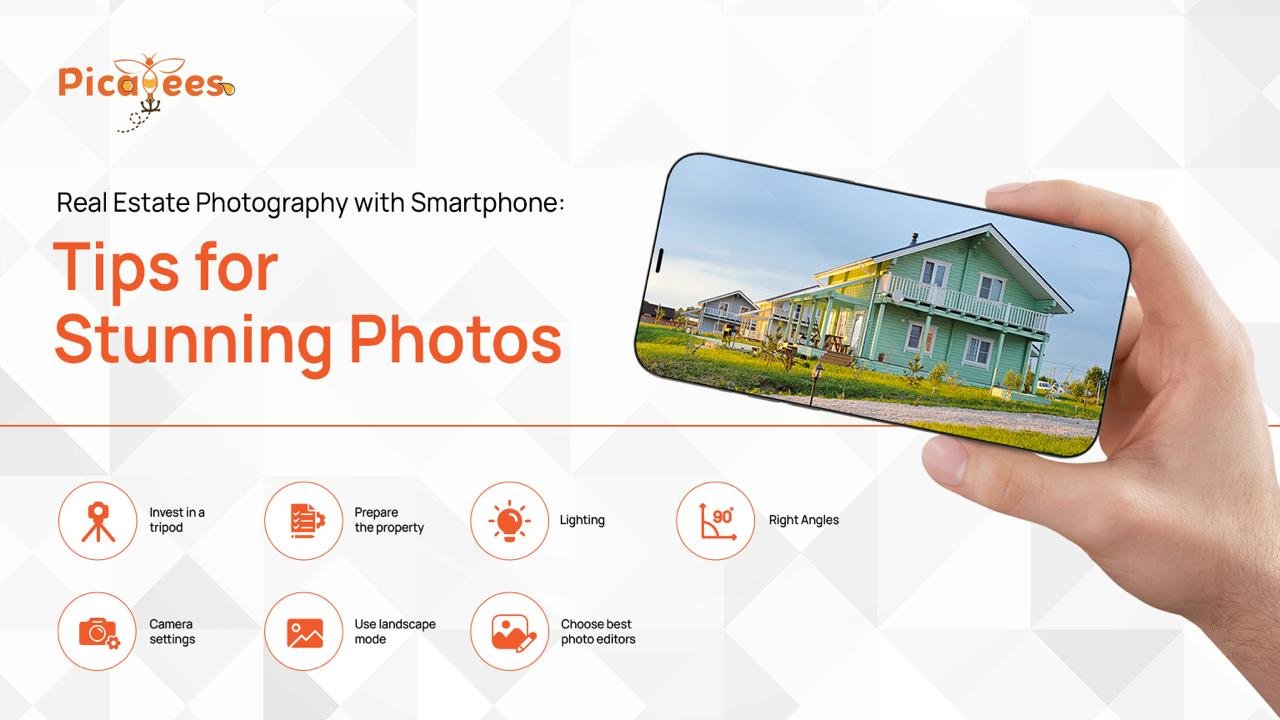
Are you a real estate agent looking to take good pictures of your properties? Real estate photography with smartphone can help you beat your competition with versatile pictures while staying within budget. Don’t worry, we’ve got you covered! Your phone is all you need to take world-class property images that’ll help you sell them like hot cakes. Whether you’re a seasoned pro or a hopeful newbie, read on for some solid advice! A Good Phone The most important thing you need to make this work is that you need to have a good phone. Unlike 10 years ago, most good phones take good, crisp photos you can rely on. And you don’t even need to have the best phone on the market, even mid-level phones these days do a great job. 7 tips to get the best of out your real-estate photography 1. Invest in a tripod Cheap and effective, a tripod is simply one of the most useful tools you can get your hands on. A tripod keeps the phone perfectly still, even on tricky surfaces, helping you get the best still photos you need. 2. Prepare the property Before snapping any pictures of the property, it’s crucial to do a quick walk-through to ensure everything looks tidy and well-organized. Avoid any clutter or mess in your shots! This might involve adding fresh flowers or ensuring the curtains are open. In the bathroom, remove any soaps, toothbrushes, and other personal items to keep the space looking pristine. 3. Lighting In real estate photography, lighting is essential. Make sure the rooms you photograph are well lit so potential buyers can clearly see all the nooks and corners of the space you’re presenting. We recommend using natural light as much as possible because it’s the most flattering. Open the blinds, turn on all the lights in the house, and you’ll be set. You can turn on the lights in the room to illuminate the room, but not all lights look pretty in a picture so be wary of what looks good and what does not. If necessary, you also use your phone’s flash, but be cautious as it may not always look flattering. Choose your timing wisely and avoid taking pictures when it’s not dark outside. 4. Right Angles Ensuring your images are level is critical. This means the photo is straight and not tilted, giving your real estate pictures a more professional appearance. Most phones have a level function to help with this, or you can use a tripod if you have one. You can also use the corners of the room as a reference point to align your phone and keep the shot as straight as possible. 5. Camera settings The next step is to set up your smartphone for real estate photography. To ensure your images are crisp and clear, adjusting a few settings can be very helpful. The most crucial setting is HDR (High Dynamic Range). HDR, or High Dynamic Range, is a camera feature that enhances your photos by merging multiple shots into one. It takes an overexposed photo to highlight the shadows, a darker one to capture details outside windows, and a normal shot. These images are then combined to produce perfectly lit real estate photos. 6. Always use landscape mode Shooting in landscape mode is the preferred orientation for many photographers because it allows for a wider field of view, capturing more of the scene in a single frame. Shooting in landscape mode can help to minimize this distortion, creating a more balanced and natural-looking image.. 7. Choose the best photo editors for real estate photography Not only is taking good photos important for your business, editing them is equally important to highlight the best aspects of your properties. Choosing an established player in the industry can be difficult and expensive unless you go with someone who can meet your real estate photo editing needs and deliver on time while keeping your budget needs in check. That someone could be us — Picabees. As a B2B photo retouching services company with over 7 years of experience, we can truly help your brand come out on top. Conclusion By following some simple tips, such as using a level and prepping the space before shooting, you can create photos that look polished and professional. Additionally, utilizing an editing app on your phone or computer can significantly enhance real estate photos taken with smartphones. Choosing the right phone for real estate photography can also make a big difference in achieving great shots. Whether you’re new to real estate photography or considering an upgrade, these phones will help you capture amazing pictures that showcase your properties in their best light. So there you have it – some tips on taking incredible real estate photos with your phone! Follow these steps, and you’ll be able to capture the beauty of any property in stunning detail. Happy shooting!
Clipping Paths: Mastering Active and Inactive Techniques in Image Editing
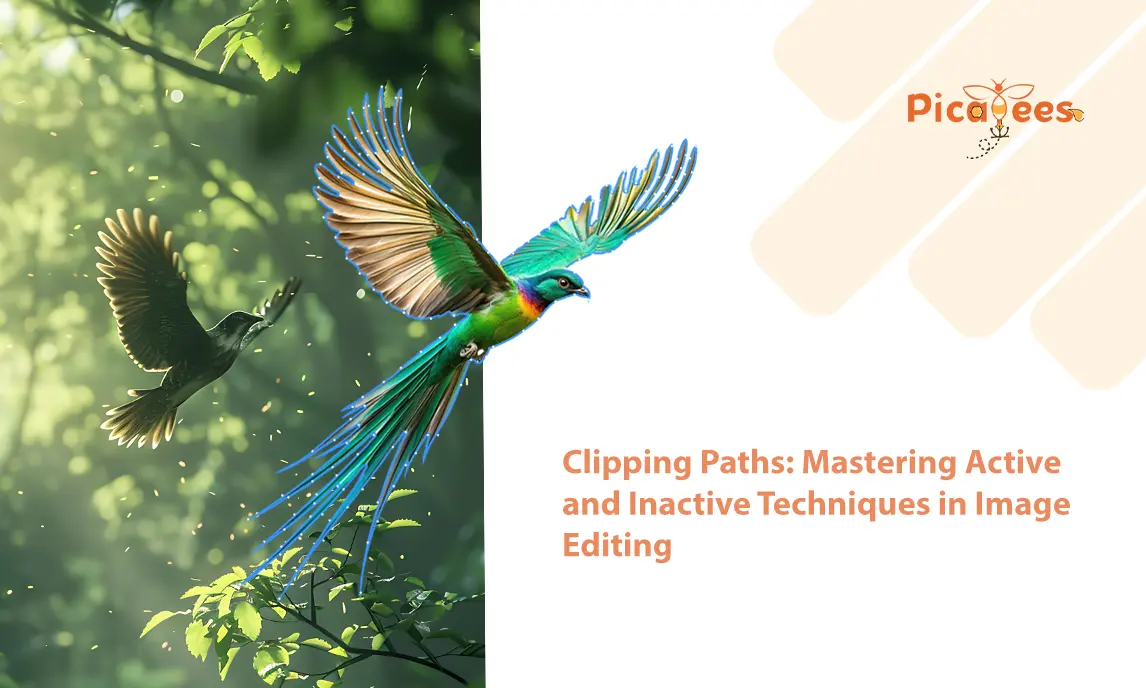
In the world of digital image editing, precision is paramount. Whether you’re a seasoned professional photographer or an intermediate enthusiast looking to elevate your skills, mastering the art of clipping paths can significantly enhance the quality of your work. In this comprehensive guide, we’ll delve into the intricacies of clipping paths, focusing particularly on active and inactive paths, and explore how they can revolutionize your image editing workflow. What is a Clipping Path? Before we dive into the specifics of active and inactive clipping paths, let’s establish a foundational understanding of what a clipping path entails. At its core, a clipping path is a vector-based outline used to isolate a specific part of an image from its background. This technique is commonly employed in graphic design and digital image editing to achieve clean and precise cutouts of objects or subjects within a photograph. Clipping paths are particularly useful when you need to remove or replace backgrounds, create product catalogs, or compose visually striking marketing materials. By meticulously tracing the contours of an object using tools like the Pen Tool in Adobe Photoshop, you can create a boundary that separates the desired element from its surroundings, allowing for seamless integration into various design compositions. 1. Active Clipping Path: Active clipping paths represent a crucial component of the image editing process, especially for professionals seeking impeccable results. An active clipping path is essentially a path that is currently applied to an image, delineating the areas to be retained while eliminating unwanted background elements. This method enables photographers and graphic designers to exert precise control over the composition of their images, ensuring that every detail is impeccably crafted to meet their exact specifications. In practical terms, active clipping paths are instrumental in tasks such as background removal, object isolation, and composite image creation. By creating a precise outline around the subject using the Pen Tool or other selection tools, you can effectively separate it from its background, allowing for seamless integration into different visual contexts. This level of precision is indispensable, particularly in industries such as product photography, where pristine imagery plays a pivotal role in captivating potential customers. 2. Inactive Clipping Path: While active clipping paths are indispensable for real-time editing tasks, inactive clipping paths offer a valuable alternative for those seeking flexibility and non-destructive editing workflows. An inactive clipping path refers to a path that has been created but is not currently applied to the image. Instead, it is stored within the image file, ready to be activated or deactivated as needed during the editing process. One of the primary advantages of inactive clipping paths lies in their capacity to preserve the original image data while facilitating iterative editing. By keeping the clipping path separate from the image layer, you can experiment with different compositions, apply adjustments, and fine-tune your edits without permanently altering the underlying pixels. This level of flexibility is particularly advantageous in collaborative environments or scenarios where multiple iterations of an image may be required. Key Differences Between Active and Inactive Clipping Paths: Understanding the nuances between active and inactive clipping paths is essential for photographers and professionals seeking to optimize their image editing workflows. While active clipping paths offer real-time precision and control over image composition, inactive clipping paths provide a non-destructive editing solution that prioritizes flexibility and experimentation. By leveraging both approaches strategically, you can achieve optimal results while maintaining the integrity of your original images. Advanced Techniques and Tips: In addition to mastering the fundamentals of active and inactive clipping paths, there are several advanced techniques and tips that can further enhance your image editing prowess. Techniques such as image masking and background removal offer alternative approaches to achieving precise cutouts, while vector paths enable scalability and versatility in your design compositions. Furthermore, tools like Adobe Illustrator complement Photoshop’s capabilities, empowering you to tackle complex clipping path tasks with ease. Conclusion: In conclusion, mastering clipping paths represents a fundamental aspect of image editing for photographers and professionals alike. By understanding the distinctions between active and inactive clipping paths and incorporating advanced techniques into your workflow, you can elevate the quality of your work and unlock new creative possibilities. Whether you’re removing backgrounds, isolating objects, or crafting compelling visual narratives, the precision afforded by clipping paths enables you to bring your creative vision to life with unparalleled precision and finesse.
Developing Photo Editing Code of Ethics: Dos and Don’ts in Photoshop
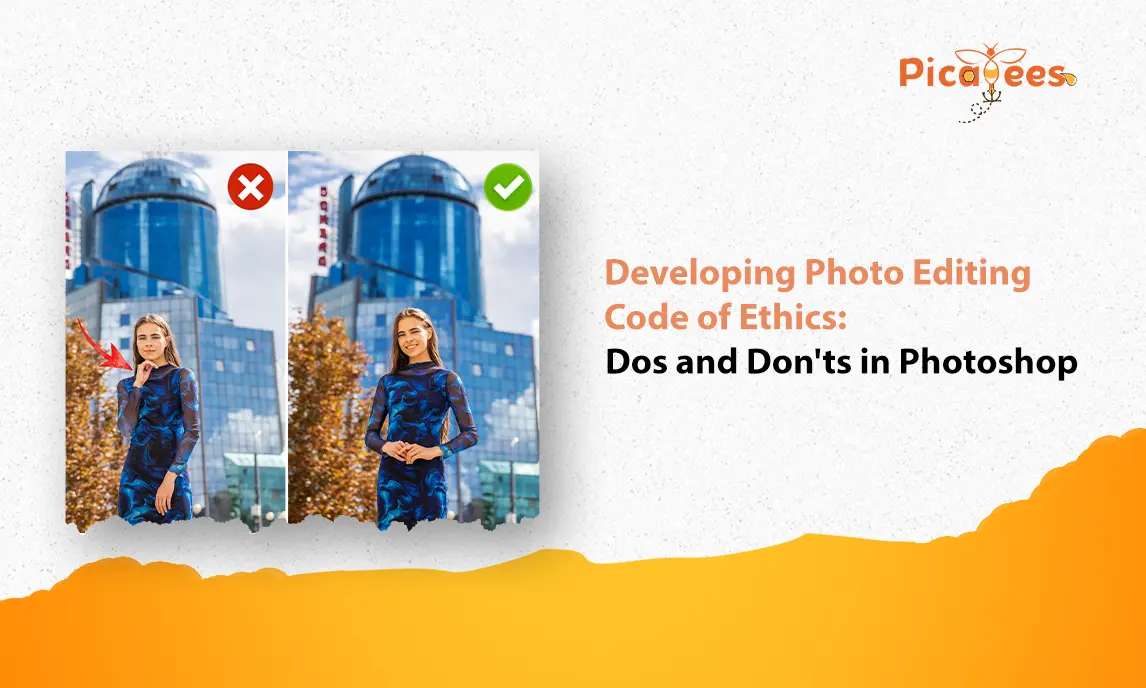
A couple of weekends ago, we were gathered at Matt’s place, enjoying some post-barbecue relaxation and reminiscing about our photography adventures. The evening was mellow, a stark contrast to the nail-biting game against the Jaguars the previous night. As we chatted, it became evident that each of us has our unique “Photoshop Moral Code” or “Photo Editing Code of Ethics.” While none of us are photojournalists, we each maintain personal guidelines for what we feel comfortable doing to our photos. As the “Photoshop Guy,” you might expect me to wield every tool available. But if you’ve been following my blog, you know I strive to get as much right in-camera as possible and use Photoshop mainly for final touches rather than corrections. Here’s a peek into my personal “Photo Editing Code of Ethics” for what I will and won’t do with my photos. This might sound strange, but I absolutely detest cropping in Photoshop and go out of my way to avoid it. I aim to compose my shots perfectly in-camera, so needing to crop later feels like a failure to me, and it drives me crazy. I’m totally okay with removing any distracting elements from my photos. Whether it’s a telephone wire, a sign, or a piece of trash, if it’s ruining my beach shot, it’s gone. No questions asked. While I’m comfortable removing objects, I strongly dislike adding anything that wasn’t originally there. Even though I know how to swap out a dull sky for a more vibrant one from another photo, I have to be in dire straits to do so, and I can count the times I’ve done it on one hand. It just feels like cheating, and I can never look at that photo the same way again. Although I’m against adding new elements, I have no problem duplicating something already in the photo. For example, if there’s an empty spot in a pumpkin patch, I’ll clone another pumpkin to fill the gap. My personal code says, “If it’s already in the photo, it’s okay to have more of it.” My goal is to make the final image look as good as it did when I took it, but if it ends up looking even better, I’m fine with that. If the grass wasn’t as green as I remember, it becomes greener. If the sky was gray, it won’t be in my final image. I don’t hesitate to double-process my images (exposing one version for the foreground, one for the sky, and combining them) or to make creative choices with white balance that might turn a dusk shot into a dawn look. I also don’t think twice about creating a “look” using Photoshop, but I avoid using effects filters. I know, I’m quirky that way. When retouching people, my guideline is simple: Make them look as good in print, where every flaw is magnified, as they did in person. I’ll use every Photoshop trick I know to achieve that. If it’s a portrait of me, I might even hire teams working round the clock to make me look like George Clooney. Clearly, they’re still at it. Here’s a quirky twist: my Photoshop ethics only apply to photos I’ve taken myself. If it’s someone else’s photo and they ask me to edit it, anything goes. I’ll use every tool to make their photo look the way they want, so yes, I have a double standard. To clarify: I’m not trying to impose these guidelines on you. It’s a personal decision, and you need to decide what you’re comfortable with. I’m just sharing my approach, not dictating. I can’t defend or explain all my choices. It’s just how I feel about my photos and editing them. If you’re not a photojournalist (who must adhere to strict rules that I fully support), you probably have your own “Photo Editing Code of Ethics.”. I’m curious to know where you “draw the line” and what you’re willing to do or not do in Photoshop to create images you’re proud of.
Top 3 HDR Photography Mistakes | Avoid Them for Stunning Results
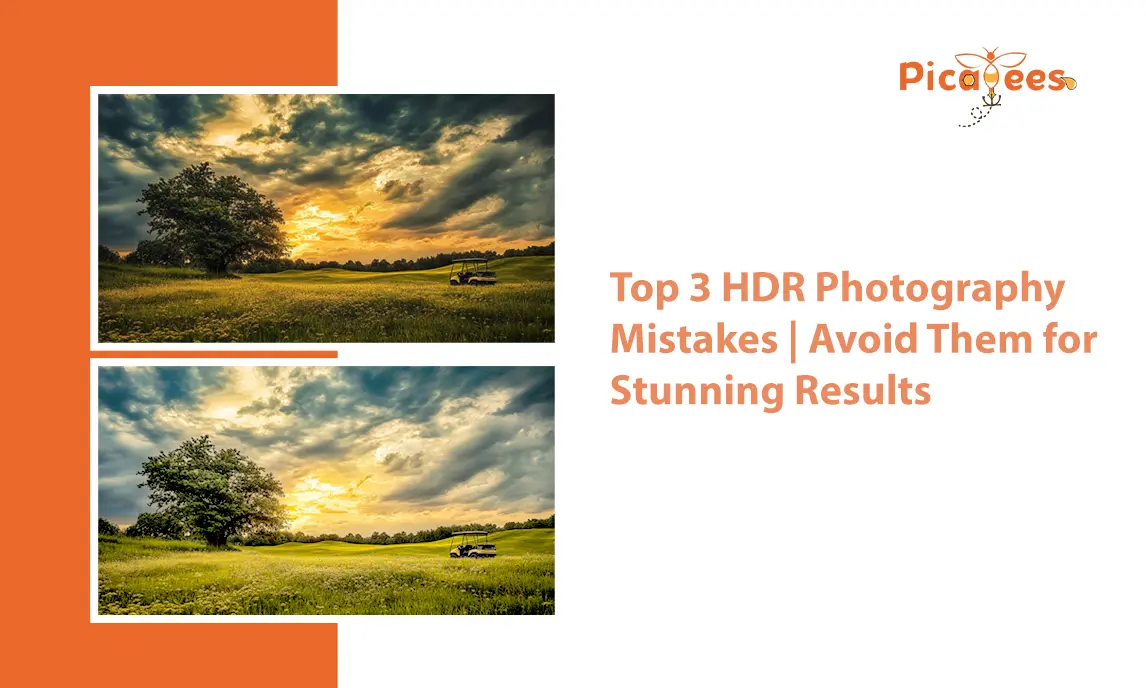
HDR, or High Dynamic Range, photography has gained significant popularity in recent years. This technique enables photographers to capture a broader spectrum of brightness and detail by merging multiple photos taken at various exposures. Although HDR can produce breathtaking images, photographers often make common mistakes that can diminish the final outcome. In this article, we will delve into the top three most frequent HDR photography mistakes. Mistake #1: Overdoing the HDR Effect One of the most common mistakes that photographers make when using HDR is overdoing the effect. It can be tempting to crank up the sliders to create a highly saturated and contrasted image, but doing so can lead to an unnatural and unappealing result. When HDR is used excessively, it can create halos around objects and people, making them look like they are glowing. To avoid overdoing the HDR effect, it’s important to use the sliders in moderation. Pay attention to the details in the image and adjust the settings accordingly. It’s also helpful to view the image on a calibrated monitor to ensure that the colors and tones are accurate. Another helpful tip is to use presets as a starting point and then fine-tune the settings to your liking. Mistake #2: Failing to Use a Tripod Another common mistake that photographers make when capturing HDR images is failing to use a tripod. HDR requires taking multiple photos at different exposures, which means that the camera needs to remain completely still between shots. If the camera moves even slightly, the resulting images will be misaligned, making it difficult or even impossible to merge them into a final HDR image. Using a tripod is the best way to ensure that the camera stays still throughout the entire process. It’s also important to use a remote or self-timer to trigger the shutter to avoid touching the camera and causing it to move. If a tripod is not available, photographers can try using a stable surface, such as a table or wall, to steady the camera. Mistake #3: Not Properly Aligning the Photos The final common mistake that photographers make when capturing HDR images is not properly aligning the photos. When merging multiple photos into an HDR image, the software needs to align them perfectly to create a seamless result. If the photos are not aligned correctly, it can create ghosting or blurring in the final image, which can be difficult or impossible to correct. To ensure that the photos are properly aligned, it’s important to use a tripod and to avoid moving the camera between shots. Some cameras also have a feature called auto-align that can help to correct slight misalignments. It’s also helpful to review the images carefully before merging them to ensure that they are properly aligned. Ultimate Solution for these mistakes The good news is that there is a simple solution to these common HDR photography mistakes: hire a professional for HDR editing. Picabees is a company that specializes in editing real estate photos, including HDR images. By outsourcing your HDR editing to professionals, you can be sure that your images will look their best and avoid the mistakes that many photographers make. Picabees has a team of experienced editors who are trained in the latest HDR editing techniques. They can help you achieve a natural and appealing look for your HDR images, without overdoing the HDR effect or creating halos around objects. Picabees also has access to the latest software and technology, ensuring that your images are properly aligned and free from ghosting or blurring. By working with Picabees, you can save time and effort by letting professionals handle your HDR editing needs. You can focus on capturing stunning images, knowing that your photos are in good hands. Picabees offers affordable pricing and fast turnaround times, so you can get your edited photos quickly and at a reasonable cost. Conclusion In conclusion, HDR photography is a powerful technique for capturing breathtaking images with a broad range of brightness and detail. However, photographers must be mindful of common mistakes that can diminish the final result. By avoiding the three pitfalls discussed in this article—overdoing the HDR effect, neglecting to use a tripod, and improperly aligning the photos—photographers can create beautiful, natural-looking HDR images that highlight the beauty of their subjects. While being aware of these mistakes and taking steps to avoid them is crucial, it’s also important to acknowledge that HDR editing is a complex and time-consuming process. For this reason, it’s often best to hire a professional like Picabees for your HDR editing needs. By collaborating with a team of experienced editors, you can ensure that your images look their best and steer clear of the common mistakes many photographers make. So, whether you’re a seasoned professional or just starting out, remember to keep these tips in mind when capturing and editing HDR images. And, if you want to achieve the highest quality results, consider enlisting a professional service like Picabees for your HDR editing needs. With their expertise and advanced technology, you can be confident that your images will look stunning and stand out from the crowd.
Why Professional Photo Retouching is Key for Business Success
Running an eCommerce business, real estate business, a professional photography studio, or any other online business? Then how you present your business and your products online can make or break your customer’s buying decisions and brand image. So, prioritizing visuals is of utmost importance. And no matter how good the photos you capture are, there is always a need for touch-ups & photo editing to turn them into flawless images — ready-to-be-used for any business. This is where outsourcing professional photo editing services help! Learn how… What is the Importance of photo image editing in your work? By utilizing professional photo enhancement services, you can eliminate any flaws and imperfections in your images, helping you create high-quality visuals that have the potential to persuade your potential customers into buying what you’re offering. Dull, distorted, blurry, or unattractive images can be an instant turn off to your customers, but at the same time, high-quality photos encourage them to click and explore your services further. Still not convinced? Here are some factual reasons why you should be… According to Hubspot, 32% of marketers think that images are the most important aspect of their efforts. A study by Etsy found that 90% of shoppers said that the quality of photos was “extremely important” or “very important” for their buying decision When deciding on a potential purchase, 75% of online shoppers rely on product photos Your content is 40% more likely to get shared when you use good visuals/images on social media platforms Any content backed with images has an average of 94% more views than ones without any. Top Reasons to Outsource Your Photo Editing and Retouching Work 1. Faster Turnaround Time: Photo editing is a time-consuming and meticulous task, something you may not be equipped to deal with your in-house team if there are a bulk of photos to be edited. That’s where Professional Photo Retouching companies come in with their expertise, sometimes providing your requirements in just a few hours. So when you outsource, you get to free up that time to work on core business activities that actually matter. 2. Meeting Rising Demand: A constant need for quality photos for websites, social media, and marketing in your day-to-day business activities can be overwhelming. To keep up with the demand, stop wasting time and avoid using outdated photos, outsourcing is the best option. You can receive newly edited photos, either monthly or as needed, whenever you need it. 3. Saving Time and Resources: Perfecting photos takes a significant amount of time and effort, unless you have a team working on only this, it is not feasible to wing it in the long-run. 4. Boosting Your Brand Image: Top-notch images on your website and social media platforms are necessary for attracting new customers and enhancing your sales and marketing efforts. Outsourcing your photo editing helps build a positive brand image and maintain the same standard. 5. Cost Savings on Tools and Software: One of the biggest reasons to outsource photo editing services is that you can save tons of money on expensive photography equipment, tools, and software. Quality photo editing not only requires the latest advanced software, but also requires skilled professionals who know what they’re doing, this can burn a big hole in your budgets. SO by outsourcing, you can simply eliminate all these expenses and instead, spend on getting quality images for a much lesser cost. But where can I find a reliable photo retouching service online? A major factor to take into consideration when choosing a Professional Photo Retouching provider is to ensure they provide top quality images at a reasonable cost with a good turn-around time and that is exactly what Picabees do with complete professional care. We also offer versatile services compatible with various image formats and support batch processing for your convenience. Our user-friendly platform guarantees quick uploads and fast turnaround times, ensuring your photos are ready when you need them. Trust Picabees to enhance your photos while preserving their original essence to deliver exceptional results on every picture, every single time.
Elevate Your Real Estate Listings with Stunning Panoramic Photos
I’m lucky that I got to spend some time exploring the majestic landscapes of India. However, there have been moments when, camera in hand, I’ve struggled to capture the image I envisioned. The scene was either too overwhelming or didn’t fit neatly into a typical single-image format. One such moment where I was really frustrated about not getting a perfect picture was when I was photographing along the serene banks of the Ganges in Rishikesh this past winter. The golden hour light bathed the distant Himalayas in a warm glow, painting the snow-capped peaks in hues of pink and orange. Using my 14mm lens to go super wide, I found that the mountains appeared to be small and distant with the frame having a lot of empty space. A panorama was the only solution. While panoramas are excellent for capturing the grandeur of natural landscapes, they are also incredibly useful in real estate photography. Just as I wanted to showcase the expansive beauty of the Himalayas, real estate photographers aim to highlight the spaciousness and unique details of properties that you want to showcase to your potential clients. But unfortunately, panoramas are easy to mess up. So here are a few tips for making an effective panorama from a series of images. But first…what are Real Estate Panoramas? Real estate panoramas are expansive, wide-angle photographs that capture a comprehensive view of a property or a specific room within it. Unlike standard photographs, which can only capture a limited portion of a space, panoramas provide a broader perspective, allowing viewers to see an entire room or a wide outdoor area in a single image. This technique is particularly useful in real estate marketing as it offers potential buyers or renters a more immersive and realistic view of the property. Panoramas in real estate photography are created by stitching together multiple images taken from the same viewpoint but with slight overlaps. This process results in a seamless, wide-angle image that can showcase the full breadth and depth of a space. The goal is to provide a virtual tour experience, helping viewers to feel as if they are physically walking through the property. What lens to use to make a panorama Wide angle lenses aren’t the right thing to use when making Panoramic Photos. The inherent optical distortion in these lenses can create a mess when we want to stitch images together. Pick a standard lens or a short telephoto; something between 40mm and 100mm will work well, though I’ve occasionally gone as high as 200mm if the situation warrants. 1. Cameras and settings It’s better to shoot all panorama images in RAW format. This allows greater flexibility in post-processing to make sure that exposures, white balance, and other settings match from one image to the next. That said, if you are careful in-camera, and manually select all your settings from ISO to exposure and white balance, you can get by with JPGs. 2. Shooting Photos A level tripod is very useful when it comes to getting near-perfect pictures of your properties. When you are using a tripod, level it. With a level tripod, as you pan, your camera’s angle will not shift up and down. If you are hand-holding be very careful to keep your camera level as you move across your scene shooting your images for the panorama. Begin shooting a bit to the side of where you anticipate your final image will start. This ensures you have some extra space on the sides of your panorama. As you pan right or left, take a series of photos, overlapping each shot by one-third to one-half of the frame. This overlap helps the computer accurately detect and align the images, so make sure to provide sufficient overlap. Move across the scene making as many images as necessary to fully capture the entire landscape. 3. Stitching Panoramas together There are numerous programs available for creating panoramas, including specialized software like PTGui, which is capable of stitching together hundreds of individual photos to create massive images. However, both Photoshop and Lightroom also offer panorama merging capabilities that work well for most scenarios. Here’s how to create a panorama in Lightroom: Select your images by clicking on the first one in your series, then press and hold the Shift key and select the final image. All the images in between will be selected as well. Right-click (PC) or Control-Click (Mac) on the selected images and choose Photomerge > Panorama. Real Estate Photo Stitching Services Get a hold of Picabee’s cutting-edge panoramic photo stitching technology to attract and engage potential buyers with an immersive viewing experience. With real estate image stitching services from Picabees, you get access to remarkable photographs, virtual tours, 360 degree photos, and full-featured, high-quality galleries edited to perfection.
5 Ways Car Image Editing Can Boosts Dealership Sales in 2024
In today’s digital age, the old saying “a picture is worth a thousand words” has never been truer, especially when it comes to selling cars. As more and more car shoppers start their journey online, the quality of your vehicle images can make or break a sale before a customer even steps foot on your lot. That’s where professional car image editing comes into play, and boy, does it make a difference! Let’s dive into five game-changing ways that sprucing up your car photos can rev up your dealership’s sales engine. 1. Turning Heads with Precision Clipping First impressions matter, right? Well, in the world of online car sales, your vehicle images are often the first handshake with potential buyers. Picabees’ car image clipping service is like giving your online inventory a sharp new suit. By precisely removing backgrounds, we help your vehicles stand out from the crowd. Imagine scrolling through a sea of car listings and suddenly, boom! There’s a crystal-clear image of a sleek sedan floating on a crisp white background. It’s eye-catching, it’s professional, and it screams “quality.” That’s the power of expert background removal. But it’s not just about making things look pretty. Our skilled editors at Picabees pay attention to every curve, contour, and reflection. We preserve those tricky details like side mirrors and shiny rims that lesser services might botch. The result? Images that not only catch the eye but also build trust with your potential buyers. 2. Crafting a Consistent Brand Image Here’s a little secret: consistency is key in branding. When a customer clicks through your inventory and sees a uniform style across all your listings, it subconsciously signals professionalism and reliability. It’s like walking into a showroom where every car is perfectly detailed and aligned – it just feels right. At Picabees, we don’t just edit one image and call it a day. We can handle bulk orders, ensuring every single vehicle in your inventory looks its absolute best. Whether you’re showcasing 10 cars or 1000, we’ve got you covered. Want to take it a step further? We can customize backgrounds to match your dealership’s branding. Imagine every car in your online showroom sitting on a backdrop that subtly reinforces your brand colors or logo. It’s these little touches that can set you apart from the competition and stick in a buyer’s memory. 3. Supercharging Your Online Visibility and Engagement In the fast-paced world of online car sales, you’ve got mere seconds to grab a shopper’s attention. High-quality, professionally edited images are your secret weapon in this battle for eyeballs. Our team at Picabees knows the ins and outs of optimizing images for different platforms. Whether it’s your website, mobile app, or social media channels, we ensure your car photos look stunning everywhere. This isn’t just about looking good – it’s about driving real results. We’re talking increased click-through rates, longer time spent on listings, and ultimately, more leads for your sales team. And here’s the kicker – we work fast. Really fast. Our quick turnaround times mean you can launch marketing campaigns and update your inventory without missing a beat. In the world of car sales, timing can be everything, and we make sure you’re always ready to strike while the iron is hot. 4. Showing Off Every Angle Let’s face it, buying a car is a big decision. Customers want to see what they’re getting into, quite literally. That’s where multi-angle views come into play, and boy, do they make a difference. At Picabees, we don’t just focus on the glamor shot. We can help you create a comprehensive visual package for each vehicle. Front, back, sides, interior – we’ve got it all covered. Our editors pay meticulous attention to detail, ensuring that reflections and shadows are preserved naturally. This level of detail not only showcases the vehicle in its best light but also builds trust with potential buyers. By highlighting unique selling points through strategic editing, we help you tell the story of each car. Maybe it’s the spacious trunk, the sleek dashboard, or that eye-catching custom paint job. Whatever makes each vehicle special, we make sure it shines through in the images. 5. Streamlining the Sales Process Here’s a thought that might surprise you: great car images can actually save you time and money. How? By reducing the need for in-person visits early in the sales funnel. When customers can get a detailed, accurate view of a vehicle online, they’re more likely to come in for a test drive already half-sold. They’ve seen the car from every angle, they’ve zoomed in on the details, and they’re genuinely interested. This means less time spent on tire-kickers and more time closing deals with serious buyers. Furthermore, consistent, high-quality imagery across your inventory builds trust. It shows that you’re a professional operation that takes pride in its vehicles. This can lead o faster decision-making from buyers, as they feel more confident in the quality of your stock. Conclusion In the digital age, your online presence is often your first chance to impress a potential buyer. Professional car image editing isn’t just about making pretty pictures – it’s about creating a powerful sales tool that works for you 24/7. At Picabees, we’re passionate about helping dealerships put their best foot forward online. Our car image clipping services combine technical expertise with an understanding of what makes car shoppers tick. We offer affordable pricing without compromising on quality, and we stand behind our work with a satisfaction guarantee. Ready to give your online inventory a professional polish that drives sales? Check out our car image clipping services at Picabees. Let’s work together to turn your car photos into your most powerful sales asset. After all, in the world of online car sales, the right image really can be worth a thousand words – or better yet, a signed deal!
Reduce Furniture Returns with Expert Photo Editing | Picabees
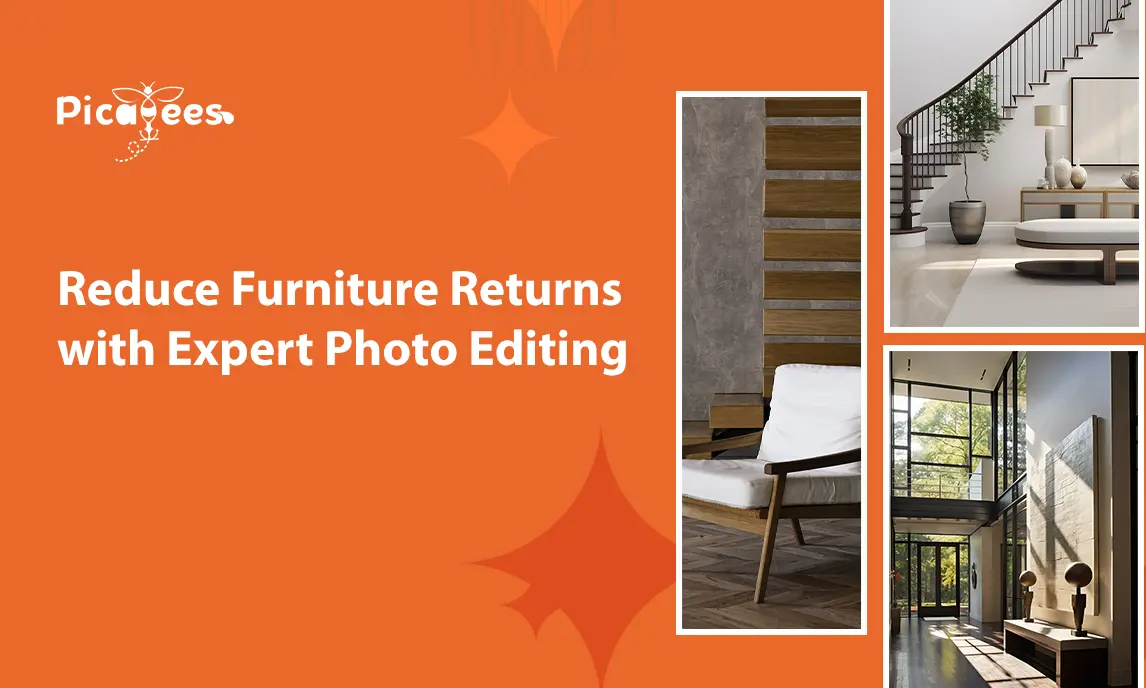
Hey, fellow furniture enthusiasts and online shop owners! Today we talk about something that’s probably giving you a headache right now – product returns. If you’re selling furniture online, you know how it goes. A customer sees a beautiful sofa on your website, falls in love, clicks “buy”, and then… uh-oh. When it arrives, it’s not exactly what he expected. He goes back, and you have to deal with the return. Ouch. But what if I told you there’s a secret technique that could help you tackle this problem? Drum roll, please… It’s furniture photo editing! Yep, those seemingly simple tweaks to your product images can make a world of difference. Let’s dive in and see how. The Return Nightmare: It’s Real, and It’s Costly First things first, let’s talk numbers. Did you know that in the online furniture world, return rates can soar as high as 40%? That’s right, for every 100 sofas you sell online, up to 40 might come boomeranging back. Even at the lower end, with a 15% return rate, that’s still nearly a quarter of sales returning. It’s enough to make any business owner break out in a cold sweat. Why does this happen? Well, most of the time, it’s because what customers see online doesn’t quite match up with what lands on their doorstep. Maybe the color’s off, or the size isn’t what they imagined. Whatever the reason, it all boils down to one thing: the gap between expectation and reality. Pictures: The Silent Salespeople Here’s the thing: when it comes to online shopping, your product photos are doing all the heavy lifting. They’re your silent salespeople, working 24/7 to show off your furniture in its best light. But if these photos aren’t up to scratch, they might be doing more harm than good. Think about it. Have you ever bought something online that looked amazing in the picture, only to be disappointed when it arrived? It’s frustrating, right? That’s exactly how your customers feel when their new coffee table doesn’t quite live up to the image they fell in love with. Photo Editing Is Your Return-Busting Superhero So, how can photo editing save the day? Let’s break it down: 1. Getting the Colors Just Right Ever ordered a “navy” blue armchair that turned out to be more “midnight” than “navy”? Color discrepancies are a huge reason for returns. Good photo editing ensures that the colors in your images match the real deal as closely as possible. It’s not about making the furniture look better than it is – it’s about showing it accurately. 2. Showing Off Those Textures Is that sofa velvet or velour? Is the wood grain subtle or pronounced? Texture can be tricky to capture in photos, but it’s super important for furniture. Skilled editing can bring out these details, giving customers a better idea of what they’re buying. 3. Size Matters No one wants to order a “spacious” sectional only to find it barely fits in their living room. Using props for scale or showing the furniture in a room setting can help customers visualize the size better. Photo editing can help create these contextual images without the need for elaborate photoshoots. 4. All the Angles One photo just doesn’t cut it anymore. Customers want to see the furniture from every angle. 360-degree views are becoming more popular, and for good reason. They give a complete picture of the product, reducing the chance of unwelcome surprises. 5. Keeping It Real As Much As Possible Now, here’s where it gets a bit tricky. While we want our furniture to look its best in photos, we also need to keep things real. There’s a fine line between enhancement and misrepresentation. The goal is to show your products in their best light, not to create an unrealistic image that’ll lead to disappointment (and returns!). Here Is The Game Plan For You So, how do you put this into action? Here are some tips: Invest in good photography. Even the best editing can’t fix a truly bad photo. Work with skilled editors who understand furniture. They’ll know how to bring out the best in your products without going overboard. Be consistent. Use the same editing style across all your products for a cohesive look. Ask for feedback. Your customers can tell you if your images are hitting the mark. The Proof is in the Pudding Need some inspiration? Let’s look at a realistic example. A furniture e-commerce company was struggling with a 23% return rate, which is average for online furniture sales. They decided to overhaul their product images, focusing on accurate color representation, detailed texture shots, and multiple angles. The result? Their return rate dropped to 15% in just three months. That’s a significant improvement, considering the furniture industry’s typical return rates range from 5% to 7% for in-store purchases. Not too shabby! At The End At the end of the day, good furniture photo editing is all about building trust with your customers. When they receive a product that looks just like the image they fell in love with online, everybody wins. You’ll see fewer returns, happier customers, and a healthier bottom line.Remember, it’s not about creating a fantasy – it’s about showcasing the real beauty of your furniture. With the right approach to photo editing, you can give your customers the confidence to click that “buy” button, knowing they’ll love their purchase when it arrives.So, ready to give your product images a makeover? At Picabees, we’re experts at bringing out the best in your furniture photos without compromising on authenticity. From color correction to texture enhancement, we’ve got you covered. Check out our furniture photo editing services and let’s make your online store picture-perfect. Your future self (and your customers) will thank you!

